
Blog

Tips

How to Save Thousands of Dollars on Your Next Underwater Shoot

After More Than Three Decades Working on Underwater Productions for networks, feature films, television series, commercials, and documentaries, I’ve noticed something interesting:

Many productions focus on cutting costs in the wrong places.

When budgets get tight, there is often pressure to reduce equipment packages, eliminate technical support, shorten prep days, or scale back underwater resources.

Ironically, those decisions frequently end up costing productions far more money than they save.

The reality is that underwater filming represents one of the smallest portions of most production budgets, but it carries some of the highest risks. When something goes wrong underwater, delays affect every department on set.

The key to saving money is not spending less on your underwater team.

The key is using that team effectively.

Experience Saves More Money Than Equipment Costs

When producers review a budget, they often see camera systems, housings, communication systems, safety personnel, divers, technicians, and support equipment as line items.

What they don’t see is the experience behind those line items.

A seasoned underwater team can identify problems before they become delays.

They can streamline equipment packages.

They can eliminate unnecessary gear.

They can reduce setup times.

Most importantly, they can help productions avoid costly overtime.

The goal is not to provide more equipment.

The goal is to get the shots and get out.

The Most Expensive Thing on Set Is Time

Every minute of overtime affects multiple departments.

Crew costs increase.

Talent costs increase.

Location costs increase.

Transportation costs increase.

Catering costs increase.

Equipment rentals increase.

The largest expense on many productions isn’t the camera package.

It’s the number of people standing around waiting.

One additional hour for a large production can easily cost thousands of dollars.

One unnecessary shooting day can cost tens of thousands.

That’s why efficiency matters.

A Real-World Example

On one recent television production, the schedule projected that our underwater work would continue until approximately 10:00 PM.

Our team reviewed the requirements, coordinated with production, streamlined the workflow, and focused on the essential shots needed to complete the sequence.

The result?

The underwater work was completed by approximately 3:00 PM.

The production achieved everything it needed.

The crew wrapped significantly earlier than anticipated.

The savings generated by eliminating hours of overtime far exceeded the cost of the underwater package itself.

That’s not unusual.

It’s what happens when experienced specialists are allowed to do what they do best.

Too Many Productions Bring Too Much to Set

One of the most common mistakes we see is overstaffing and overcomplicating underwater shoot days.

Productions often arrive with excessive personnel, unnecessary equipment, redundant decision-makers, and workflows that slow the entire process.

Underwater days should be focused.

Every person on set should have a purpose.

Every piece of equipment should have a purpose.

Every decision should support getting the shot safely and efficiently.

The more streamlined the operation, the more successful the day becomes.

Communication Is Everything

The best underwater productions begin long before anyone enters the water.
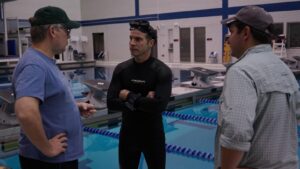
A simple conversation during prep can prevent major expenses later.

When production shares its goals early, experienced underwater teams can often recommend:

  • Simpler shooting approaches
  • More efficient camera systems
  • Reduced support equipment
  • Better scheduling
  • Faster setup strategies
  • Safer workflows

These recommendations are rarely about spending more money.

They’re usually about spending smarter.

Don’t Cut the Wrong Corner

Every production has budget pressures.

That’s reality.

But when evaluating where to reduce costs, it’s important to understand the difference between a luxury and a necessity.

Specialized underwater personnel, communication systems, safety procedures, technical support, and properly prepared equipment are not extras.

They are the foundation that allows the day to run efficiently.

Removing them rarely saves money.

It usually shifts the cost elsewhere through delays, overtime, reshoots, or safety concerns.

The Bottom Line

Productions don’t hire an underwater team because they need equipment.

They hire an underwater team because they need results.

The most successful productions understand that experienced specialists are not an expense.

They are a cost-control strategy.

At Air Sea Land Productions, our job is simple:

Help productions capture the shots they need, operate safely, avoid costly delays, and finish the day as efficiently as possible.

Because the cheapest shoot day isn’t the one with the lowest equipment budget.

It’s the one that wraps on time.
Air Sea Land Productions
Specialized Underwater and Technical Production Solutions.
Tips

How Underwater Camera Technology Has Changed Filmmaking

Filmmaking has always evolved alongside technology. From silent films to digital cinema, every advancement has expanded the way stories are captured and experienced. One of the most remarkable transformations in modern cinematography has happened beneath the surface — through the development of underwater camera technology.

What was once considered highly specialized and difficult is now a major part of modern filmmaking, documentaries, sports broadcasting, and commercial production. Advances in underwater camera systems have opened entirely new creative possibilities for filmmakers around the world.

The Early Days of Underwater Filming

Capturing footage underwater used to be an enormous challenge. Early film cameras were large, fragile, and extremely difficult to protect from water damage. Productions relied on heavy waterproof casings with limited movement, making underwater scenes expensive and technically demanding.

Beyond equipment limitations, filmmakers also had to deal with poor visibility, difficult lighting conditions, and restricted communication between underwater crews and surface teams.

As a result, underwater filming was often reserved for large-budget productions with highly specialized teams.

Digital Technology Changed Everything

The transition to digital filmmaking dramatically improved underwater cinematography. Cameras became smaller, lighter, and more powerful, allowing filmmakers to shoot high-quality footage in environments that were once difficult to access.

Modern underwater camera systems now offer:

  • High-resolution image quality
  • Improved low-light performance
  • Compact and lightweight designs
  • Better stabilization systems
  • Enhanced mobility underwater
  • Remote monitoring capabilities

These innovations have made underwater filming more flexible and efficient while giving filmmakers greater creative control.

Expanding Creative Possibilities

As technology improved, underwater cinematography became more widely used across different types of productions. Today, underwater footage is commonly seen in:

  • Feature films
  • Nature documentaries
  • Television productions
  • Commercial advertising
  • Music videos
  • Sports broadcasting
  • Streaming content

Underwater visuals add a unique sense of immersion and emotion that traditional filming often cannot replicate. Whether capturing marine life, action sequences, or artistic visuals, underwater cinematography allows audiences to experience scenes from entirely new perspectives.

The Importance of Specialized Equipment

Even with modern advancements, underwater filming still requires highly specialized equipment. Cameras must be protected from water pressure while maintaining image quality and reliability.

Professional productions often rely on underwater housings, splash protection systems, communication tools, and specialized camera rigs designed specifically for aquatic environments.

These tools help filmmakers safely capture footage while maintaining the flexibility needed for creative storytelling.

Improved Safety and Efficiency

Technology has also made underwater production safer and more efficient. Real-time monitoring systems, remote camera controls, and advanced communication tools allow production teams to coordinate more effectively during underwater shoots.

This not only improves workflow but also reduces risks for divers, camera operators, and production crews working in demanding conditions.

As equipment continues becoming more reliable and portable, underwater cinematography is becoming increasingly accessible to a wider range of filmmakers and content creators.

The Future of Underwater Cinematography

The future of underwater filmmaking continues to evolve rapidly. Smaller cinema-grade cameras, improved stabilization, underwater drones, and wireless production systems are pushing the industry forward.

As audience expectations for cinematic visuals continue to grow, underwater storytelling will likely play an even bigger role across entertainment, advertising, and digital media.

The combination of technology and creativity is allowing filmmakers to explore environments and perspectives that were once nearly impossible to capture.

Final Thoughts

Underwater camera technology has significantly changed the filmmaking industry by making underwater production more practical, efficient, and visually impressive.

What was once limited to large-scale productions is now a growing part of modern visual storytelling across many industries and formats.

For productions looking to work in challenging environments, experienced equipment providers and production specialists remain an important part of the process. Companies like AirSeaLand continue supporting filmmakers with specialized underwater production equipment and technical expertise that help bring ambitious creative ideas to life.


Tips

The Physics of Filming Underwater (And Why Lens Choice Matters)

Filming underwater is one of the most technically challenging environments in cinematography. The moment a camera enters the water, the physics that shape the image change dramatically.

Light bends, colors disappear, pressure increases, and movement becomes slower due to water resistance. These forces influence everything from how a scene looks on camera to what lenses filmmakers should use.

Understanding the physics behind underwater filming allows cinematographers to adapt their gear and capture clearer, more cinematic footage beneath the surface.

Refraction: Why Underwater Images Look Different

One of the most noticeable physical effects underwater is refraction.

Refraction occurs when light travels between two mediums with different densities. When light moves from air into water, it bends because water is denser.

This bending alters how objects appear on camera:
– Subjects appear closer than they actually are
– The field of view becomes narrower
– Straight lines may appear slightly distorted

Underwater housings often use dome ports to correct these distortions. Dome ports restore the natural field of view of wide lenses and help preserve image quality.

Flat ports, on the other hand, magnify the image slightly and are often used for macro photography.

Color Absorption: Why Reds Disappear

Water absorbs different wavelengths of light at different depths.

The deeper a camera goes, the more colors are lost.

The order of color loss generally follows this pattern:
– Red disappears first
– Orange and yellow fade next
– Green and blue travel the farthest

This is why underwater footage often appears overwhelmingly blue or green.

To compensate, underwater cinematographers use artificial lights, red filters, and manual white balance adjustments to restore the colors that water naturally removes.

Pressure: The Deeper You Go, The Stronger It Gets

Pressure increases rapidly underwater. For every 10 meters (33 feet) of depth, the surrounding pressure increases by roughly one additional atmosphere.

Underwater camera housings must be built to withstand these forces without leaking or deforming. Professional housings are typically made from aluminum or reinforced materials and sealed using O-rings.

Even the smallest seal failure can allow water to enter and damage camera equipment.

Drag: Why Underwater Movement Feels Slow

Water is far denser than air. Because of this, any object moving through water experiences much greater resistance, known as drag.

For filmmakers, this affects how cameras move through the water.

Large camera rigs experience greater drag, which makes fast movements difficult. Instead, underwater shots often appear smooth and slow, creating fluid and controlled motion.

Visibility and Particle Scattering

Unlike air, water is filled with particles such as sand, plankton, and organic matter.

When light hits these particles, it scatters. This scattering can cause a visual effect called backscatter, where particles appear as bright floating specks in footage.

To reduce backscatter, underwater cinematographers typically place their lights at an angle rather than directly beside the camera lens.

The Physics Behind Choosing the Right Lens Underwater

Lens selection underwater isn’t just a creative choice — it’s largely dictated by physics.

Water reduces contrast, clarity, and color over distance. The farther a subject is from the camera, the more water interferes with the image.

This is why underwater filmmakers rely heavily on wide-angle lenses. Wide lenses allow the camera to get physically closer to the subject while still capturing a large environment, reducing the amount of water between the camera and the subject.

Wide-Angle Lenses

Wide lenses are ideal for filming coral reefs, shipwrecks, divers, large marine animals, and underwater environments.

These lenses are often paired with dome ports, which help maintain their wide field of view by correcting the refraction caused by water.

Fisheye Lenses

Fisheye lenses are even wider than traditional wide-angle lenses and create an extremely large field of view with a curved perspective.

Underwater cinematographers use fisheye lenses when they want to capture dramatic environments while staying extremely close to the subject, minimizing the amount of water between the lens and the subject.

Macro Lenses

Macro lenses are used for filming small marine life and detailed textures.

These lenses work well with flat ports, which slightly magnify the image and help capture fine details. However, macro filming requires precise focus and careful lighting because the depth of field becomes extremely shallow.

Why Telephoto Lenses Rarely Work Underwater

Telephoto lenses are useful on land when subjects are far away, but underwater they are rarely practical.

Because water reduces clarity and contrast quickly, filming from far away results in hazy footage filled with particles and color loss.

For this reason, underwater cinematographers usually follow one simple principle: get close to the subject.

Where Science Meets Cinematography

Underwater filmmaking sits at the intersection of physics and visual storytelling.

Every shot is shaped by the environment: light bending through water, colors disappearing with depth, pressure affecting equipment, water resistance shaping camera movement, and lens choices compensating for optical changes.

By understanding these physical principles, filmmakers can adapt their techniques and equipment to capture the stunning visuals hidden beneath the surface.


Tips

Underwater Production: Control vs. Authenticity

Studio Tank vs. Real Location: Choosing the Right Water Setup for Your Shoot

When a production calls for underwater or water-based scenes, one of the biggest decisions is whether to shoot in a studio tank or on a real-world location like the ocean, lake, or natural pool. Each option brings creative advantages and logistical challenges, but for many productions, the choice often comes down to three key factors: control, safety, and visual consistency—including technical considerations like achieving clean pool blacks.

The Power of a Controlled Environment

A studio tank offers something every production values: predictability.

Inside a controlled facility, filmmakers can manage nearly every variable, lighting, water clarity, temperature, weather, and shooting schedule. There’s no waiting for the perfect sunlight, no sudden storms, and no unexpected environmental changes. This allows directors and cinematographers to:

  • Precisely shape lighting setups
  • Maintain consistent continuity across takes
  • Rehearse complex camera or stunt movements safely
  • Capture multiple angles without environmental resets

In contrast, real locations introduce variables that can enhance realism but complicate production. Changing tides, shifting sunlight, wind, or murky water can quickly derail a carefully planned shoot. While natural locations provide authenticity, they often demand flexibility in scheduling and shot design.

Safety Comes First

Water shoots always carry risks, and professional safety teams are essential in both studio tanks and natural locations.

Studio tanks are designed with built-in safety advantages such as controlled depths, clear visibility, temperature regulation, and easy equipment access. These features help safety divers and crew respond quickly and maintain close supervision throughout the shoot.

However, it’s important to note that safety divers and trained water personnel are just as important, and often required, on natural water sets as well. Oceans, lakes, and rivers typically involve additional risks like currents, uneven terrain, or limited visibility, making experienced safety supervision critical regardless of where filming takes place.

Whether in a tank or on location, proper planning, certified safety divers, and clear emergency protocols should always be treated as non-negotiable parts of any water production.

Achieving Clean “Black Pools”

One technical advantage of studio tanks is the ability to achieve true Black Pools, the deep, clean black backgrounds often used to create the illusion of endless depth or open water.

In a controlled tank setup:

  • Walls and floors can be painted or draped in black
  • Lighting can be tightly shaped to eliminate spill
  • Water clarity can be maintained for crisp contrast
  • Reflections can be minimized with controlled angles and surfaces

This makes it much easier to isolate subjects, composite backgrounds, or create stylized underwater looks. Achieving the same effect in a natural location is far more difficult due to ambient light, particulate matter, and unpredictable reflections.

When a Real Location Makes Sense

Despite the advantages of studio tanks, real locations still have their place.

Natural environments can provide:

  • Authentic textures and landscapes
  • Realistic wave movement and light refraction
  • Larger-scale environments without tank size limitations
  • Unique visual storytelling opportunities

For wide scenic shots or moments where authenticity outweighs technical control, shooting on location may be worth the additional logistical challenges.

Finding the Right Balance

Many productions ultimately use both approaches:

  • Studio tank for close-ups, dialogue, stunts, and controlled underwater work
  • Real location for wide shots and environmental establishing scenes

By combining the safety and precision of a tank with the visual richness of real-world environments, filmmakers can achieve the best of both worlds.

Final Thoughts

Choosing between a studio tank and a real location isn’t just a technical decision, it’s a creative and practical one. If your priority is control, safety, and consistent visual quality, especially when clean pool blacks are required, a studio tank may be the ideal solution. If your story demands natural scale and environmental realism, a real location can deliver unmatched authenticity.

Understanding the strengths of each option, and ensuring proper safety personnel are in place in any water environment, helps keep your shoot safe, efficient, and visually compelling from the first setup to the final frame.

If you have any questions or concerns, please don’t hesitate to reach out for professional services or further assistance. We are here to help your vision come to life:

Website: airsealand.com
Telephone: +1 (718) 626-2646
Email: rentals@airsealand.com


Tips

Flat vs. Dome Lens Ports: What’s the Difference?

When shooting underwater, the type of lens port used on your camera housing has a major impact on image quality. The two most common options — flat ports and dome ports — behave very differently once submerged due to how light refracts underwater.

Flat Lens Ports

Flat ports use a simple, flat piece of glass placed in front of the lens. While they are straightforward, durable, and often more affordable, flat ports significantly alter how light behaves underwater.

As light travels from water to glass to air, it bends, a phenomenon known as refraction. This causes images shot through a flat port to appear magnified, similar to looking through a dive mask. The result is a reduction in the lens’s field of view by roughly 25%, along with increased edge softness, distortion, and potential color fringing when using wider lenses.

Why flat ports still matter:
This magnification can actually be beneficial for macro and close-up photography, allowing small subjects to fill the frame more easily.

Flat ports are best suited for macro, close-focus work, and scenarios where above-water framing or split-level composition isn’t a priority.

Dome Lens Ports

Dome ports feature a curved optical surface specifically designed to counteract underwater refraction. This curvature allows light rays to enter the housing more naturally, helping the lens retain its intended field of view and reducing distortion.

A key characteristic of dome ports is that they create a virtual image underwater. Instead of focusing on the subject itself, the lens focuses on a virtual image that appears closer than the actual scene. Because of this, proper lens selection, aperture choice, and focus calibration are critical for achieving sharp results.

Pro tip:
Stopping down your aperture (e.g. f/8–f/11) helps improve corner sharpness when shooting wide-angle scenes with dome ports.

When used correctly, dome ports deliver sharper edges, wider coverage, and more natural-looking images. They are the preferred choice for wide-angle photography, cinematic underwater footage, reefscapes, wrecks, and clean over-under (split) shots.

Flat Port vs Dome Port

Feature Flat Port Dome Port
Field of View Reduced (~25%) Maintains original lens FOV
Best For Macro & close-ups Wide-angle & cinematic shots
Edge Sharpness Limited with wide lenses Excellent when configured correctly
Over-Under Shots Not ideal Preferred option

Choosing the Right Port

If your work focuses on macro subjects or fine detail, a flat port is often the better and simpler choice. For expansive underwater scenes, wide-angle compositions, and professional-level image quality, a dome port offers superior optical performance.

Choosing the correct lens port ensures you’re getting the most out of your camera system, and capturing the clearest, most natural underwater images possible.


Tips

Editing for Fluidity: Building Emotion in Post-Production

The Rhythm Beneath the Waves

Editing underwater footage isn’t just about piecing together clips, it’s about sculpting rhythm from silence. Every cut breathes, every fade mimics the pull of a current. The ocean moves differently than air, and so should the story it carries.

On land, we cut for energy, for motion, for reaction, for pace.
Below the surface, we cut for emotion, for breath, for stillness, for suspension.

Underwater, time expands. Gravity disappears. And in that slow gravity-less space, editing becomes less about speed and more about surrender.


1. Breathing Rhythm: Finding Natural Pacing

If land editing follows footsteps, underwater editing follows breath.

Divers inhale and exhale slowly, each breath lasting several seconds, each movement delayed by drag and resistance. To honor that, underwater edits should feel like breathing cycles: in, hold, release.

A shot that lingers just one second longer underwater can feel more honest, more emotional. Rushing underwater cuts can break the illusion of submersion, the audience needs time to float.

Try matching your cuts to:

  • The diver’s breathing rhythm
  • The rising or falling motion of bubbles
  • Shifts in natural light from surface reflections

Watch how My Octopus Teacher or Blue Planet II use these cues, not to show action, but to let stillness become narrative.


2. The Sound of Silence: Designing Emotional Soundscapes

Sound is the invisible current that carries underwater storytelling.
Even though water muffles sound, it heightens emotion.

Instead of filling silence with music, design it.
Layer deep hums, soft crackles, distant sonar pulses. Let the sound of a single exhale or fin stroke echo like memory.

Practical techniques:

  • Use low-frequency ambient tones (40–80 Hz) to evoke depth.
  • Add reverb and muffled EQ filters to simulate sound absorption in water.
  • Mix breathing and heartbeat sounds as narrative anchors.
  • When using music, keep it sparse and fluid, no sharp percussion.

The result: an audio texture that feels like immersion, not background.


3. Color as Emotion: Grading Beyond Correction

Color correction restores reality. Color grading creates emotion.

Most editors instinctively remove the blue-green tint of underwater footage. But sometimes, that tint is the story.
Cold cyan can feel lonely. Warm amber hues can feel human, hopeful, sacred.

Rather than chasing natural colors, decide: what emotion should this scene breathe?

  • Blue: Isolation, calm, introspection
  • Green: Mystery, danger, organic tension
  • Amber / Gold: Warmth, human connection, surface proximity
  • Desaturated neutral: Memory, dream, passage of time

Use vignettes, gradients, or light flares not to hide flaws, but to paint feelings.
Every wave refracts light uniquely, your grade should too.


4. Seamless Transitions: Merging Land and Sea

Stories often begin above the surface and descend into the deep, that transition can either jar or enchant the viewer.

Instead of hard cuts, let the elements connect:

  • Fade out surface sounds (wind, birds) as you cross-dissolve into underwater hums.
  • Carry bubbles or lens flares across the cut to visually “dive” through the edit.
  • Use one unbroken motion, a camera tilt, a pan, or a ripple, to pull the viewer from land to sea.

Editing underwater isn’t about masking two worlds. It’s about weaving them into one continuous breath.


5. Flow Over Formula: Building an Emotional Arc

Think of your edit like the ocean: waves of tension and release.
Every scene should rise, peak, and recede.

  • Tension: A diver descends, the unknown grows.
  • Peak: The moment of encounter, a creature, a revelation, a reflection.
  • Release: A drift, a pause, an ascent.

When you cut, cut for emotional flow. Don’t chase traditional story beats, chase the rhythm of immersion.

Your edit should not move, it should breathe.


Closing Reflection: Editing as Submersion

Editing underwater footage is an act of empathy.
You’re not simply presenting what happened; you’re guiding the audience into a state of surrender.

In the stillness between cuts, they remember what it feels like to float, to be held by something vast and alive.

When you stop cutting for speed, and start cutting for stillness,
the ocean begins to speak.


Quick Notes for Editors

  • Always color-grade within scene context, not in isolation.
  • Test your mix with headphones, it reveals subtle pressure shifts.
  • Embrace imperfections: particles, flares, distortion, they’re the ocean’s signature.
  • Let every edit “breathe” for one extra beat longer than feels comfortable. That’s usually where the magic lives.

About

From concept to completion, Air Sea Land is the largest production and rental house for Professional Underwater camera gear and Jimmy Jib rentals in the North East, US.

Learn more:

Air Sea Land Productions
Specialized Underwater and Technical Production Solutions.

To begin your Rental Process

Learn more about our rental options and professional camera services

View Rental Process and Documents

Tel: 718-626-2646

Insurance

Insure My Equipment is your online portal for production equipment insurance. Instantly and securely purchase policies to cover rented equipment.